Monday, April 3, 2023

Burnout and Basics

 In the Great Before, I would regularly start going to SCA events on the first weekend of February and have something hopping every weekend until the end of March. This year I started the first weekend in February and have yet to stop. It looks like my schedule is booked through the last Saturday in April. While I have extroverted tendencies, I'm starting to feel exhausted just from ALL the people. This may not have been my best plan ever.

The reason I have been going to so many events is that I've started teaching my Absolute Basics classes. I noticed a little bit ago that we have lots of intermediate and advanced level classes for people who are interested in going deeper into topics, but we rarely offered the starting level stuff anymore.So far I've taught Basic Knitting, Basic Hand Sewing, and Basic Fingerloop Braiding at different events, including Gulf Wars.

In Basic Knitting I teach people how to cast-on, deal with adding or dropping stitches accidentally, and how to cast-off. I also chat about different kinds of knitting needles, how to read a ball band for gauge and weight, and how to burn test fibers when you don't know what they are. I've taught the class twice this year and both times had the total gamut of experiences, from students who were emotionally disturbed by the process, all the way through people who cornered me later and demanded to be taught lace knitting.

Basic Hand Sewing is a little less physically complex for new students. I teach running stitch, back stitch, and blind hem stitching. I have them make a small pouch during the class and we discuss the differences between embroidery and surface decoration vs. structural seams.Check out these videos  by the amazing Mary Corbet to see some stitching action.I also chat about the burn and bleach test and explain WHY natural fibers are worth the time and money. I've only taught this one once and all of the students were already moderately accomplished, but none of them had done a buttonhole before so that's how we finished things.

For Basic Fingerloop Braiding, I start with 3 loops or bows, each a different color. When I tried to teach it as the Basic 5 Bows, people really had trouble with tracking everything. I've also taught this class twice this year and it's been the most successful one so far. I teach a Flat, a Round, and what's called and Open lace. The Open lace is two smaller braids that run next to each other. You can attach or detach them at any point along the braid by switching from one style to another.

I want to develop my own lacing skills so I can show people how many more styles are out there. My next personal goal is the broad lace chevon of eight loops. I've been working on a Spanish Great Cloak set and feel that a trim will look better than my trying to embroider it. There are no pictures of the current state of the thing because it's really not pretty right now. I might give up and just use his idea of taking down cordage instead.

I have another Spanish Surprise in the works. If I get it finished, I'll update the blog next week when I have pictures.

See you on the Road!


Sunday, February 20, 2022

A Hair-y Issue

 Let's talk about toppers! What should I wear on my head and/or how should I try to wear my hair for this upcoming event?

I'm aiming for a 10th century generic Scandinavian look, which ought to give me a number of options.   Bigger the place, the more stuff we have, right? Not exactly, no.

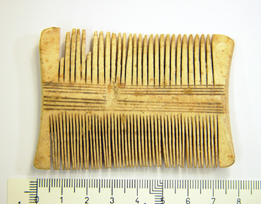
I decided to start my hair-dressing search with a dependable source, The Viking Answer Lady. The site creator, Gunnora, is a personal friend of mine and I've always admired her dedication to research. The page looks kind of dated, but she regularly updates the research and is absolutely willing to change her statements if she gets new information. The first thing I noticed is the collection of combs that she shows off in various museums. While many of the museum finds are ivory or bone, there is discussion of wooden combs in the same style. They looked really familiar and I knew I wanted one. I did a little poking around and discovered there are a number of shops on etsy that carry "beard combs". The same big tooth/ little tooth shape and small enough to fit in your hand but big enough to do the job. The prices range from about what I'd pay for a normal plastic comb all the way up to the super carved and personalized double digit ones. 


Yes, I know I'm not going to be wearing the comb, but it's a nice place to start ( oooh, new toy!). I could make one, thanks to this good 'ible over on Instructables. But I'm not very good at wood yet.  So I bought a nice hardwood comb and started using it as part of my nightly hair care routine. since it's not really safe to get a hair cut during the pandemic I've been growing my hair out for about 2 years. I had it trimmed in January of 2020, but it was roughly shoulder length at the time. Now it's gone to about the small of my back and I've been looking into ways to take care of it, so it will grow longer and so that I'm not being attacked by hair constantly and just wack it all off in a fit of pique. I found the Long Hair Community Forums and spent lots of time reading up. Wooden combs, braids, and head coverings are all hot topics of discussion there, as well as how and when to wash your hair and other useful topics.

 Previously I had made a "Dublin Cap"  using the information  and pattern direction provided by Jennifer Thies . While the cap came out ok, I didn't look very good in it. Turns out I have a very tiny head and a close fitting cap makes that look weird. I did use a fine linen instead of silk for the cap, but that didn't change the drape very much.

A little more searching brought me to Ciar's Stitch in Time blog post on Viking head coverings. I really appreciated how she listed the Who/What/When/Where of each one of her looks. Braids! Scarves! Pointy stick buns! All this plus an interesting and interactive comment section! I exclaimed a lot while I was reading. I really recommend it.

One of the commenters mentioned the Silkeborg Museum and added a link that at one point went to an article about the Elling woman. I poked around on that website but was unable to find the article in question. My Danish is non-existent, but Google was able to translate the page for me fairly well. Elling Woman was a bog body found in 1938 in Silkeborg, Denmark. Her estimated date of death was 280 B.C.E. which makes her far older than  the 10th century Norsewoman I'm trying to emulate. However, her hair was braided and twisted (and preserved) in a style that does look a bit like some of the Valkyrie figurines like that on the Osburg Cart.


So how to make the hair do that? I was very lucky to find a video by the talented Silvousplaits which has this exact hairstyle as the last one of three in a set.


She's an absolute gift to people like myself who literally can not understand written directions for hair. I need to see it happen, and then I need to see it again a few times just to make sure I can figure it out. I really enjoyed poking around on her other videos as well, since there are days I need a pinless bun or a four strand braid just for work.

It looks like I'll be trying out the Elling Woman braid, as modeled by Silvousplaits, and possibly covering it with one of Ciar's sexy scarf looks during the day. Thank you Internet for giving me some new things to do with my hair.


Sunday, February 13, 2022

Not Exactly Norse

 I've been working on finishing things this week as I have an upcoming Norse themed event I want to attend. The more I research, the more I feel like there's no way to actually know for certain what a 9th or 10th century person might wear. It's easy to say "t-tunics and trews" but there's so many area and gender specific flourishes that I get bogged down. The fact that very little of the original items have survived is also majorly frustrating. My understanding is that many of the surviving pieces are wool, lined with linen or wool, trimmed with bands of silk. All of that is extremely warm in Texas.

In an effort to actually cover myself before the event, I threw research to the winds and decided to make an SCA standard apron dress. The place I'm going has a theme of blue and white, so I figured blue apron, white underdress, no problems.  Of course there were problems. I have no blue wool at all. I pulled every piece of blue linen I own off the shelves and none of them were large enough to make an apron dress, even when I decided to go for the knee-length version ( not historically supported). Eventually I rummaged the mending pile and pulled out a partially finished cotton/ linen skirt. If I seamed it carefully, it would work as a slightly odd apron dress. 

I did some figuring, and flipping, draping the fabric around me and pinning it into shape. Then I had my partner take some pictures of me from a distance so I could see how it would hang. Because of the strange patches in the skirt, I wound up having three triangular gores at the back of the apron dress, and two on each side. This put a seam directly down the middle of the front, unlike any apron dress I've ever seen, but it didn't look too bad.

Oh those old seams though! This poor old bit of fabric has been hard used. Back when I had been in the SCA for a handful of years I found a Wal-mart that was closing down it's fabric section, selling everything at a steep discount. I was super poor but they sold me a bolt of cotton/linen for about $2 a yard and I was so excited. My first period fabric! um...maybe. That fabric is probably more cotton then anything, the only linen quality it has is the ability to wrinkle if you look at it too hard and to fray in a gentle breeze. Over the years I've made tunics, over dresses, pants, and bags from that single bolt. At this point, all that's intact is this bit in the mending pile that had been on the way to becoming a skirt before I figured out there wasn't enough fabric left. The oldest seams were sewn by hand in black quilting thread, the newest ones sewn by machine in a sort of gray. I hand sewed the newest seams and flattened them, tucking the edges under and securing them with a whipstitch. I used a thread that matched the fabric pretty well, I couldn't see it on either side of the fabric.

Outside of apron dress

Inside of apron dress


Then, I added a strip of handwoven trim. This isn't a fancy trim, but it was also one of the first ones I ever made. It's been kicking around for over 10 years waiting on me to find a good project for it. This is a real historical piece, but only in my own history.

Finally, I added straps and put it up on my dress form, Janey, to see how it looked altogether.


I haven't had a chance to wear it, but I don't think it'll be too bad. I do have broaches and a really nice festoon to wear with it. I don't currently have a belt that will work, but I'm hoping to figure out the 12 strand flat braid belt before next week (HA!).

I still haven't finished the saffron color underdress, so I'll wear one of my older white ones. It's a heavier weight linen with a small amount of chain stitch embroidery around the collar and cuffs. If I get frustrated with the dress again, I might just lay out and frame up a fancy collar on an embroidery frame.

I did also finish up my very first pair of stranded colorwork mittens as well. These are in no way historical, but I liked them and thought they were cute. I did the first one very quickly, but the second one sat while I played with other projects. When I picked it back up, I wasn't exactly sure where I was in the pattern, which is why they aren't identical. They are fraternal twin mittens we'll say.

Pattern is Owl in Forest on Ravelry

Considering how random the weather is this year, I might be wearing them to the event anyway. 

I started knitting a new cardigan as well. This is Eirwen over on Knitty.com. I've never done a cardi before, but I feel a great need for this one. It's knit from the top down so hopefully I'll be able to see how it's going to fit as I'm working on it. I've already had to switch to a smaller needle size then what's recommended to get gauge, which seems rather odd to me. I want my gold star for swatching though! I did actually swatch, twice! Perhaps next week, I'll have enough to show you, right now I'm only on row 8.


Sunday, February 6, 2022

Sew here we are again

Here we are, in the Year of Our Pandemic 2022, and things are a bit of a mess. Still, we're learning and sewing more all the time. 

So let's take a look at what projects are currently on the work bench. First there's the Subtle Dress. This is a very thin cotton in what I mentally have dubbed SCA Period-oid style, Ye Olde Faire Clothes if you will. The silhouette is sort of generally 15th century Florentine and I suspect that's what I'll accessorize it towards.

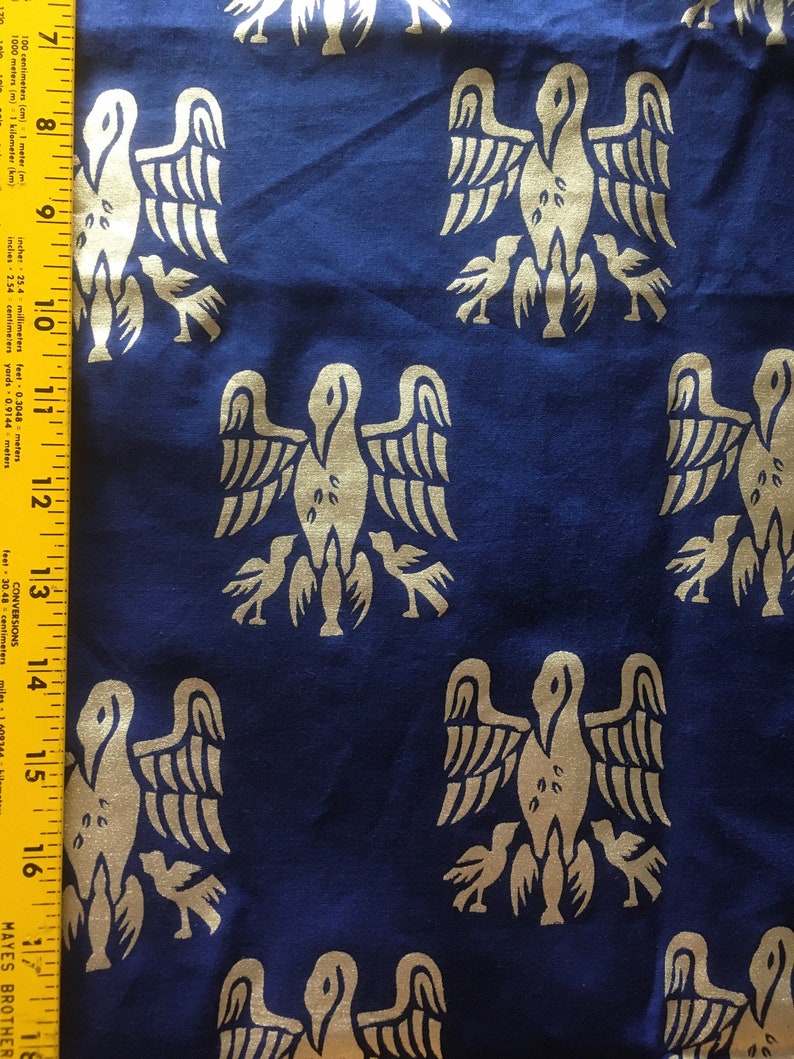
Clearly, the reason it's subtle is the delicate print. You'd hardly even notice the HUGE WHOPPING BIRD on it. I got the fabric from Cok Guzel over on etsy and it's totally worth it. 

 The gown itself is based loosely on Jen Thompson's 1480's Florentine Gown, but not closely enough you'd see the resemblance I think. Her write-up is great though.I really want to do more of these just for the experience, but the dress diaries do lure me down so many rabbit holes.

The next thing that's been taking up space in my brain is a piece I'd like to enter into a competition, assuming it ever gets finished. I'm making a 10th Century Norse linen underdress for a woman. It is saffron-colored ( modern dyes are MUCH cheaper thanks), and hand-sewn on all the seams. I'm using a very tiny running back stitch where I take about three stitches onto my needle at once, pull through, and then do a small back stitch to anchor it. Then, once the seams are done, I'll go back over them and finish them using a whipstitch on folded over seam allowances.

 I could opt to flatten the seams and use a thread of wool to whipstitch in a filler thread, but my test piece itched me pretty badly. I think that technique will need to wait for an over garment. Many of the techniques I'm trying are documented in Woven Into the Earth by Else Ostergaard and in Medieval Garments Reconstucted by Anna Norgard and Lilli Fransen, as mentioned by Morgan Donner in the Sexy Potato video. Both of these books are on my personal wish list and I've been reduced to borrowing them to read furiously before returning them to their owners. I've also used the website Needlework in the Viking Age for some good reminders.

 One of the items of frustration and then moments of inspiration that occurred during this build was based entirely on bad math. My brain had read (somewhere) that period looms tend to max out on weaving width about 22 inches (55cm) wide. So I cut my rectangles on that assumption and started stitching away. After I'd done one arm and a very nice neck hole all the way, I saw a video by the accomplished Opus Elenae that reminded me not to finish the seams totally until the garment is done. This helps keep the stress on the seams balanced, so they don't wind up pulling in odd directions. It's a good thing I didn't finish them all the way. Pulling the partially sewn garment on to make sure I had the side gores in the right spot showed me that there was no possible way this thing would fit me. There was a fair amount of swearing and some hasty re-mathing.

 After a sulk I had some time to think. IF a loom was 22 in wide, then there was no way I could cut a width wider then that and neither could anyone in period. I realized I've NEVER seen documentation on that loom width in a book, but if it occurred then piecing was the only reasonable option. So, the sleeves came off this morning and I'm going to add extra thin rectangles of material down the sides to extend it. The sleeves themselves fit just fine, but the tightness of the chest and back made the gown much too short. I'm hopeful that little quirk will be worked out when I get the extra piecing added.It occurs to me that will lengthen the arms a bit, so there will be nice deep cuffs to add weight. Perhaps they need some embroidery?


 The other thing that I've been working away on trying to work my way up to goldwork embroidery. I've done some goldwork and silverwork in the past ( the difference is the materials, not the techniques)and I know I want to practice before I spend so much money. One of my worst problems is I've never properly dressed a frame or hoop and my fabric tends to be horribly droopy and sloppy. I've also not had a lot of practice with laying tools ( I don't own any). Here's a guide to laying tools that I drool over sometimes. I don't want to buy a bunch of silks to work with and then find out I can't use them, so I'm started working my way through some tutorials. I downloaded a Tudor Rose Roundel pattern from NeedlenThread.com and I'm slowly filling it in with chain, stem, and satin stitch. It's been in progress for over 2 years now, but so has the rest of the world.

I hope the world is bright on your end and you always know where your seam ripper is currently.

Tuesday, August 28, 2018

San Japan 2018

I am utterly distracted. I forgot that I needed to do some work for the San Japan demo at the end of this week. I pulled my usual demo dress out and it has rust stains all over the white satin skirt. ARGH!!!
So, different dress, move on. Other dress will need a ruff made and I need to repair my horribly abused hoop skirt. If I CAN make a new one before the weekend, great. The odds aren't good though. I'll also need a mask for Friday night's masked ball.
The mask I made is a quicky version of Belphoeb's vizard. Instead of a backram base I just hot glued cotton velveteen to a plastic commercially available craft mask. I don't have the drying time right now to do it the way she did, but I'll give it a try later when I'm not on a time crunch.
I'm using Noel Gieleghem's document on how to produce a 1570's stand alone ruff for my directions on How-To. As I have already failed everyone by using the cotton muslin I have in my stash to make the thing, I doubt I'll show him any pictures. My supply of cotton lace has vanished on me and I'm just tossing bobbins and thread around like crazy.
Pictures will occur later if there's anything worth looking at.

Thursday, August 23, 2018

Canaples progress- Kirtle Questions

It's been a busy week but I've got a bit of progress to report on the Madame Canaples dress.
First of all: Embroidery!

I did a line of overlapping scallops, inverted and drawn out so that the longer legs made a little diamond when they touched. To get the perfect half circle, I traced around a shotglass that has a picture on it. From one side of the picture to the other was exactly the right shape for the space. I used 3 strands of DMC black cotton embroidery floss and I worked it in backstitch without a hoop because it was faster. I really like how the pattern came out, it was easy to visualize and break down into working steps. I haven't added the leafy bits yet because I'm still debating how much of them I want to do.
In the picture it looks like three small projections from the top and bottom of each half circle. Is that center bit a triangle shape? Are those vines? The extra bits don't look like blackwork to me exactly, but I don't know if satin stitch was mixed with blackwork in 1525. I would err on the side of 'no', so it's going to be more time with a magnifying lens to figure those bits out. Also, I'm about to start couching the gold cord I have around the top edge of the smock today. I have a plastic gold filament thread to tack it down and I'll probably use a very tiny whip stitch to get it in place.

Secondly: Pattern drafting!
I have a friend, Simona della Luna, who has attended several of Matthew Gagny's bara workshops and she has walked me through the process a few times. I'm still not 100% sure I took down the information correctly because I feel like I get a different shape off the body block every time I do this. However! I do recommend it for getting a basic flat pattern that you can fiddle with very easily. I ALWAYS remeasure if it's been more than 3 months since I last built something. Don't know about you, but my body can move a lot of weight around in 3 months and with something close-fitting like a bodice, it's going to matter. That's why I put the date on all my pattern pieces every time as well as "front', 'back', 'left arm' or whatever. You THINK you'll remember, but I never do.
So, I grabbed an old mostly cotton sheet and cut out the first of a few drafts. It used to be that I would cut my pattern out of the lining right from the start, but I want to make SURE this one fits better before I take up the scissors against my linen. These are my striped baby steps from the front and from the back.

Thoughts so far:
For a draft that supposedly had no seam allowance, that's really big. It does fit over the smock, so yay. But...really big.
I need to make some temporary tack-in lacing strips so I can test how it will look when it's held on with lacing instead of pins. That's not a huge deal yet ( 1st draft!) but they'l come in handy shortly.
Dang, those are some slender sexy straps on that gorgeously wide neckline! I hope that high back will keep everything on the shoulders properly.

Last time I posted I had some questions about the kirtle opening. I asked my questions (poorly) in a wonderful Facebook group, The Elizabethan Costumers, and got some GREAT feedback. Those gentlebeings really know their stuff. What it boiled down to is there might be 3 layers ( smock, kirtle, gown) or there might be four layers ( smock, stomacher, kirtle, gown). There's a bunch of different ways to describe what we're looking at but until we find a picture of Madame with her top layer off we not going to know for sure. Because I'm trying several new-to-me techniques for this particular outfit, I'm going to go against the portrait slightly.
I'm going to make this kirtle with a fairly low neckline, bringing it down below the neck of the gown, but keep the lacing at the sideback( suggested by Kimiko Small, all praise her brain!). That will allow me to padstitch the front of the kirtle heavily because the support I'm going to need is no small thing. My upper deck requires extra mooring so I'm also going to make sure to lightly pad and bone the front of the gown as well. Simona is trying to talk me into using bonding straw/ canes for that top layer and the more I think about it the more I like the idea. *plot, plot, plot*
One of the biggest things I have to keep reminding myself about is that there is NO TIME LIMIT on this dress. It's not a sprint, no one is waiting on it. I can take my time and work out all the details so I'll be actually happy with it when I'm done. Settle down ADD brain, we've got plenty of tiny details to obsess over!

Which is why I'm in the middle of making a hat too. It just had to happen, no I don't think I can wear it with this dress because it's super Castilian. I'm doing it anyway because it makes me happy. I borrowed the idea from Stanzi in Lochac. She did one after staring at this picture for awhile and I agree with her.
I've been looking for hats with better sunblocking power since I got my first round of skin cancer. I think might do nicely.
ScatterBrain, AWAY!

Tuesday, August 14, 2018

Madame de Canaples- 1525

Things happened, Life occurred. We appear to have stabilized, although the current house has much less crafting space. Let's take on a big big project and find out how that's going to affect things.

This is Marie d'Assigny, Madame de Canaples painted by Jean Clouet in (roughly) 1525.

Every now and then one of those "Who were you in history?" quizzes crosses my media and I always get this picture. Admittedly, we share a similar number of chins and something around the cheekbones. I've been trying to stay in the 1490-1500 range for awhile, but that dress really does look sharp. So I lost my mind and started working out how to build it.
What I see in the portrait is three layers.

Layer One: I see a square necked smock/ camicia/ shirt thing with a blackwork band and a gold edging. I made a smock using the pattern for a 16th century Venetian camicia found here: Realm of Venus
It was fast! It required very little math! It was... gathered into a neckband that couldn't disguise it's lumpy, bumpy weirdness. This was NOT the fault of the pattern. I figured out I skipped a step in the gathering stage and didn't tack it down and sew it flat BEFORE I put the neckband on. Still not sure how I missed that step, but it had to change. I pulled the neckband off, smoothed my gathers into pleats, tacked them all down and reattached the neckband.
Currently I'm in the process of marking out the blackwork on the neckband. The embroidery doesn't look very hard to do. It appears to me to be a series of half circles, superimposed on one another, with leafy bits added. Like so...


Layer Two: This is the layer that is giving me stress. From what I have read, this should be a supporting layer, a boned and structured kirtle that will provide the support needed and smooth things out to create that conical shape so beloved of the period. In the English portraits of about that same time period, the kirtle clearly is either a side or back lacing gown with all the support built into the front.
See the yellow kirtle under Anne Cresacre's 1527 gown here:

However, Madame's kirtle is pretty clearly a front laced kirtle. Not only that, but the lacing is WIIIIIDDDDEEE apart in the front. I don't think it even comes over as far as her nipple-line in fact. It's possibly built like a German or Venetian gown of roughly the same period, but I just can't tell.
And then there's this 1490 Portuguese lady dressed in black with the super-wide lacing dress as well:


Layer Three: The outer layer of the dress is a dusty rose large patterned brocade. The dress looks like a version of the Queen Jane dress with it's structured, lightly-boned front-lacing bodice that has a pinned stomacher over it and the excessive two or three part sleeves.


I've already done a version of this dress years ago and with much less information on how it was supposed to go together so I'm not very worried about that top layer.
This is a picture from 2011 of the Six Queens event I co-hosted. I'm the one in all red. Yep, that dress is all kinds of wrong now that I look at it, but I was very proud of it then. I keep it to remind myself that I can be proud of older work too, even if I always try to do better the next time.

I haven't really gotten into the hoops/ no hoops issue on this dress yet. My research says HOOPS, my desire to have it all done and wearable says NO! Hoops will probably win, but I'll grump about it.
Let's see what happens!

Thursday, September 1, 2016

Plans and project management

The other day I was chatting with a friend who does project management for a living. I've taken a few classes on the topic myself, as well as working as a stage manager before. Trust me, they have a lot in common. Anyway, he was talking about how to use the techniques I've been trained in to manage and control my art. Setting out a PM plan ahead of time would be a good way to help me plan my future projects, but I've never done it before. I'm a little hesitant to try and limit my slightly spontaneous crafting style with such a document, but I have reason to think it would allow me to complete more things. I have a terrible habit of getting bored and wandering off mid-project.

So, let's set up the current list of things that need doing and develop a plan for them.
1) I need to create a lecture on the 15th century (1400's) in Western Europe.
a) It must cover the whole century's events
b) It must give an overview of clothing worn
c) It must be interesting and get people excited about learning more

2) I need to write down and polish a set of stories for bardic
a) They have to be mostly true and /or period
b) They have to be 2-3 min long as spoken word performance
c) They have to cover a range of emotions and be able to fit to certain themes

3) I need to create a full Tudor noble woman gown
a) Smock
i)reuse an older piece I already have
ii) embroider the collar
b) Kirtle
i) Get help making a self-supportive pattern for both side and front lacing
ii) Tropical weight wool or linen? Have to make the choice
c) Gown
i) it has to be patterned over the kirtle so it goes last
ii) Need to find an inexpensive fabric that looks period and pricey

Of all these projects I think the Tudor ensemble will be the easiest to make a PM plan for and the hardest to actually build.The personal bardic collection has been difficult, but I think I have a few new ideas on how to make it come together. The overview paper should be fairly quick, but I admit I'm slightly blocked on it. It's been awhile since I wrote a paper at all.
I'm going to go back through my PM notes and hope to have a basic project summary for all three of these things soon.

Tuesday, February 10, 2015

The Spanish Gonete

The current project of choice is in the plotting stages right now. I've been looking at these sorts of pictures and decided I needed a spiffy short jacket.


This style of jacket is referred to as a gonete, a cos or a saino according to Ruth Anderson [Hispanic Costume 1480-1530, pg 213].I am using the information gathered by Kate Newton in her recreation of the same piece of clothing. On Ms. Newton's webpage she states that "Carmen Bernis, the formidable Spanish clothing historian, refers to pretty much every short jackety Spanish thing as a gonete. "

Ms. Newton's work has been highly inspirational to me and I hope she will not be offended if I take a few liberties with her research. I currently have no wool fabric on-hand, nor do I have the money to buy any. Therefore this gonete will need to be created out of the linen I have on hand. I plan to make over an old pale blue linen fencing doublet into the inner and outer layers I feel this garment will need and use a piece of heavy cotton canvas as the stiffening layer. I will also use a royal blue 50/50 linen-cotton blend fabric as the bias and trim. I will need to learn how to create a softly-curved peplum for the lower edge of the garment and I will use hook and eyes as the closure.

When I do get this pattern put together in a way I like, I have a mulberry colored velvet that I will use to make my outfit for next Yule. I will spend some time practicing my goldwork embroidery and attempt to recreate the middle picture. I hope to find a closer look at the goldwork around that collar sometime soon.

First Plan of Attack:

Take apart old doublet
Iron it
Use cotton canvas to make a pattern/ lining
Cut linen to pattern and sew up
Cut and iron trim and attach
Set hooks
Create needlelace "eyes"

Let's see what happens next!

Wednesday, March 5, 2014

Lessons learned from the Working Woman

So the outfit was finished in time and I was able to wear it the next day. Our local SCA chapter had been asked to provide people, crafts, and combatants for a demonstration of skills at a local library to celebrate the release of the newest book in the Game of Thrones series. I was the Fiber Arts Guild for the day, so I brought my inkle loom, a basket of assorted fibers both on and off the drop spindle, and some knitting in various stages of completion. I also got to test drive the Flemish Working Woman's outfit and boy am I glad I did.

Let's take a look shall we?

First of all, the bodice which had been skin-tight during the draping process was now quite a bit too big for me. Since both the kirtle and the gown bodice where based on the same pattern, I was SWIMMING inside them. I have since removed almost 4 inches of fabric from the center back of the supportive kirtle and I expect to soon do something similar to the gown, just so it doesn't look like I'm wasting away from some horrible disease inside my clothes.

Secondly, the lovely partlet doesn't have any ties at the bottom. While the underarm ties and the throat button held it on my body, the lack of a tie under the breast line caused it to flap around like an over-sized lobster bib.Today I purchased some adorable handmade brass pins that will slow that flap down quite a bit and prevent me from looking quite so much like a refugee from Red Lobster. I'm going to have to search for more though, as there were only 8 pins in the pin case I found at the antique mall and I know they're going to work out of the linen and vanish once in use. I'd like to get these from Wooded Hamlet but it looks like they're out of stock for now. Jas Townsend has some, but I don't like the eye at the top of the pin, I'd much rather have it flat.

Last but not least, let us consider that coif. Oh that saggy, baggy, what-the-heck-is-on-my-head coif...Well, that's not exactly what I had intended to wear. Poor planning on my part is my only defense. I had been planning to wear the wired attifet found in Margo Anderson's excellent Elizabethan Wardrobe Accessories that I had made for a production of Merry Wives of Windsor some time back. That first attifet was out of a lightweight cotton and was generally a very well-behaved hat, with only the minor habit of wanting to twist around on my hair after a few hours. Since I had discovered that wearing a coif might work better with a forehead cloth underneath (How To Wear a Coif ) I felt that a few moments work with some handy linen and I could solve that problem. However, I have apparently loved that hat not often enough and for too long, for it appears to be totally missing somewhere in the craft room.

Step the next was to try and build something in a rush. I've really been loving the sevenstarwheel Transition Coif and made it up all in a hurry to see if it would do. I thought my head was pretty small, but using those measurements I created a coif that just barely squeaked over my ears and the back triangle didn't cover anything. The pattern seems to work out in all the other particulars, so when I have the time I'm going to scale it up and try it again. Very likely I did something wrong since I was in such a massive hurry anyway. However, as I was building it, my inner nag kept going "It's the wrong period for the dress, you know that", the she was annoyingly right. At that point I did the appropriate thing and went to bed.

As I had to work the next day I grabbed an old linen coif that had been given to me a few years ago. I've never worn it before due to assorted reasons and it took some fiddling to figure it out. The coif is a sort of bag with a sewn on front flap and gathers on a ribbon in the back. By cinching the ribbon down as tightly as I could and tying it on top of my head I was able to keep the bag on my head. There's not enough ribbon to go around the whole bag and my hair as well and everything slid off every time I turned my head quickly.I may be able to salvage it though with a forehead cloth and a little thoughtful trimming.

I consider this outfit a success in progress. It's not perfect yet, but it's all on the right track and I'm going to be very proud to wear it all when it's done. Not that it will ever be done-done. I need to get the shoes right, and I need a pocket, and a really good hat, not to mention trading the cotton smock for a linen one and... we shall call it a work-in-progress.

And now, the fun pic to remind me to get back to sewing!


Wednesday, February 12, 2014

The Story of Two Dresses

For the longest time I've been wanting a Flemish Working Woman's Outfit. The whole she-bang like the one Lady Drea put together here
I've been making it in bits and pieces over the years and it never came out right. Most of the time this was because I skimped on the materials and tried to find short cuts in the pattern. Then I had a surgery on the schedule ( non-working gall bladder), and this left me with plenty of time to start working up my Flemish dress.
Step number one was the choice to go fully period for a middle/lower class gown and NOT wear any support. No corset, no pair of bodies, not even any boning at the edges for this one. I am one of those with a remarkable upper deck and I wanted to see if things can be successfully supported and controlled without the bones. I still have scars on my hips from a badly fitted corset worn to an anime convention.
Step number two: picking a pattern. After a considerable amount of back and forth with myself, I chose to use Caroline Johnson's kirtle pattern from The Queen's Servants . There is a great deal of arguement about if one should use a waist seam with the kirtle gathered into it under a Flemish gown, or if one should go for a smooth seamless look. I've always been more fond of the seamed theory myself, although the usual turn-back of the skirts and the addition of an apron makes it pretty hard to tell.

Clearly, I would need to add a fabulous hat, pin-on sleeves, a plain apron, and possibly a spindle to get the whole outfit to come together

One of the major reasons I picked this particular pattern however is that I suspect this is the same kirtle style found in one of my favorite portraits of the time.
This is Katalina or Catherine of Aragon in about 1503. See the layers? I'm guessing that she has on a smock, a black kirtle enriched with tiny golden Scallops of Santiago, a yellow plastron or stomacher of some kind, and then that yummy chocolate brown silk velvet gown. If I can get the Tudor kirtle to work my next step is hunting down bunches of tiny metal seashells. This dress has to be a multi-tasker!

After I picked the pattern, I asked a friend to drape it on me. As we were both fairly loopy on painkillers at the time, I'm not absolutely sure the pattern is what I'm looking for, but we'll see.I followed the directions on Constructing A 16th Century Flemish Outfit from the Elizabethan Costuming page and have discovered a few things I would recommend.
Sew your lacing rings to a strip of cotton twill tape in order to make sure you have the right number you will need with the correct spacing. I've tried to sew things directly to the gown before and it always gets out of true.
If your dress dummy isn't as tall as you are, there will come a point when you need help with the hem. Get all your layers on and ask for some help BEFORE you destroy a perfectly lovely skirt.
When in doubt, go back and look at the pictures again. There are loads of great dresses out on the internet. Search for images of "Flemish gowns", "Flemish Working Women", or " Flemish market day". Also see if you can find a group of costumers on-line who may have already done whatever you're stuck on and ask. They might have a few handy tricks up their sleeves as well.

In our Next Episode: Can these dress both be ready to wear before the demo on Friday? Will our Heroine remember to leave enough room for her arms in the sleeves?? Can ANYONE remember where I left my basket of spindles???

Monday, May 21, 2012

Gray Cats, Black Dogs, and Cephlopods


I have a pair of gray cats. I got them both from different shelters, about a year apart. The older one is named Smokey Topaz, for his fur and striking eye color.


The younger is Theodore Roosevelt because he's a bully little cat and I didn't want to call him Winston. Also, he's sort of fat so we speak softly and carry a large cat.


A few weeks ago, Smoke ran away. He's been an indoor cat his entire life, all nearly 13 years of it. I had to borrow a trap from the Humane Society to get him back in the house because he was so freaked out by the Big Blue Room. His geek tan was gone, he was running a fever and something had bit or stung him on the nose, causing it to swell badly. So Smoke had to visit the Cat Hospital, which is just about his least favorite place on earth.
The vet told me he was ok, except for the nose. I was told to take him home and feed him these little pills everyday for a week and he'd be fine. I took him home, opened the cage door and he took off like he'd been lit on fire. I didn't' even SEE him for over a week, although I was fairly sure he was in the house as I heard heart-tearing mewling every night. Eventually I cornered him in the workshop and got him pinned in a small bathroom with food, water, and a litterbox. Vet was called and informed me that cat might be slightly feral due to basically having a kitty break-down and I'd have to start civilizing him from the beginning. So it's brushing and gentle conversation and attempted petting every other hour or so. I have yet to get a pill into him, but he's starting to trust me again. One step at a time.

This, mixed with a few other things going on, combined to make me feel really bad last night.My Celtic ancestors sometimes referred to it as "chased by a Black Dog". In the Appalachians where some of my folks are from I've heard it called "a Black Dog on your porch". I was in that spot where you don't want to talk to anyone, but you NEED someone to come a tell you it's all ok. Crippled by my own inability to ask for help and locked in a place of self-hate I did what most people I know do. I went to the internet.

I tried funny cat pictures, I tried looking at costumes, I tried chatting to people on-line. None of it helped. Then I decided I just needed to make something, anything, as long as it was small, cute, and fast. I popped over to Ravelry and found this pattern for a Crochet Octopus
This pattern was fast, it made sense, it was well shaped and 2 hours later I had a cephlopod. I messed the head up a little so it doesn't know if it's a squid or an octopus, but it's darn cute. I'm going to give it eyes and a name sometime today.


TL:DR "Kitty pictures and Cute Crochet!"


Tuesday, May 15, 2012

Iced Coffee: Cold Brew

So it appears to be summertime. It hasn't been as hot as usual here yet, but I know it's only a matter of time before the roads get melted around the edges again and the cats beg me to shave them. How can a dedicated coffee drinker like myself manage to survive in such a harsh environment? I'm so very glad you asked.

This link will tell you all kinds of useful information on how to cold-brew coffee. I've heard of it referred to as 'toddy' or 'gravity-brewed' coffee as well.
I did mine a little bit differently from the link. I used a thermos I had handy that holds 6 cups of water with a little room left over. I added 20 scoops of a medium roast coffee, capped it, shook it a few times, and left it on the counter overnight. The next morning I poured it into the basket filter on my coffee maker, then poured that through again, making sure to have a clean filter in place the second time. The regular grounds I used were all caught by the first filtering, but I did it twice just in case. Then I poured it into a small glass jar and stuck in in my fridge.

What this means is you can always have a quantity of cold coffee starter in your fridge, so you don't even have to operate the coffee-maker first thing in the morning. Just add milk (almond, soy, or cow) and you have a lovely summer beverage that used no electricity and added no heat at all to your home. Ice cubes and a shot of caramel simple syrup will raise this to a whole new level, if you want to spend a little extra time and wash a pot afterwards.

Sunday, May 13, 2012

Candlemas 2012 "Spanish Gown"


I promised a few pictures of the Scavenged Dress and these are the only ones I still have. You can see the square neckline doesn't quite work out, but on the whole I'm rather proud of this, considering I didn't buy much of it for this project at all. It's not actually too short for her, she was still getting used to walking in hoops in the wind in the second picture.


Tuesday, May 8, 2012

Change and Fear

On the 12th of May, this very Saturday, I'm going to get up very early in the morning. I'm going to put on the make-up, beat my hair into submission and possibly make an attempt to wear pantyhose. I shall throw myself into a car for an hour's panicked drive to get to a large room where I will sit for a few hours in a giant poly-blend sack of black fabric. At some point, I really hope someone will call my name, I'll walk across a stage, shake hands with a guy who is in on the joke, and pick up a roll of paper.
I'm going to walk the stage at commencement.

The whole idea of this scares me to little pieces.

First of all, I'm not actually graduating on Saturday. There was a small problem with the school's computer and six advanced credit hours have vanished from my transcript. It's a real shame, but the school just can't seem to do anything about it so hand over another $2000 and take two more classes this summer.I've already made arraignments with two wonderful professors who have been kind enough to let me do independent studies this semester. That's the joke bit. I'm not sure if they will call my name Saturday or not, but even if they do one of the professors I'll be working with is the guy handing out the degrees. We both agree it's a farce, but it's a well-dressed one.

Secondly, I've been going after this degree for a long time. Since 2004 off and on, I've made the push to get this degree and go on to grad school. I tell random people in the street that I'm living my dream of getting education. But really I have no guarantees, any more then the next student. Will I get the job I want? If I do get it, will I be able to pay for the loans I have to take to get here? I will have spent 11-12 years in school working towards my goal and I am approximating 2-3 years worth of income to pay for each year of that schooling. I have made the choice to mortgage my life. Is it the right one?

Thirdly, I'm human. I have yet to meet a single human in my whole life who really likes change. Some folks talk as if they do, but even they usually have something at their core that they want to leave untouched. I'm actually a stick-in-the-mud boring sort of person who isn't into change at all. Sometimes my idea of boring isn't the same as the neighbors, but I consider my life happily sedate most of the time.

More then anything else, I don't feel like I've earned this. I don't feel that I have the right to walk across that stage, take the paper, and say "I did it!"

But I have done it. I made myself go to school, even when I was working 60hr weeks and had the lead in a big play. I studied for midterms by my sister's hospital bed when my niece was born and for finals while waiting for the doctors to call about my father's heart. I did all the paperwork, all the jumping through hoops and financial fol-de-rol that the government thinks I needed. I even kept up on my work during an IRS audit. Through literal storm, flood, and fire I drove over 100 miles a day to get to and from class. I had emotional and financial support from my husband and parents, but I did this. I have made it happen and I will see it through to the end.

And in the fall I will start on my graduate school at the University of North Texas, working to be come a digital archivist. I'll finish that too.

"We gain strength, and courage, and confidence by each experience in which we really stop to look fear in the face... we must do that which we think we cannot."
~Eleanor Roosevelt

Sunday, February 27, 2011

Attack of the Knits!

So a little while ago I discovered a program that accepts hand-knit items for donation to the homeless. They promised me they'd even take my nasty acrylic yarns if they were knit into useful items. Suddenly I've been re-inspired to knit all kinds of things!

One of the big reasons I haven't been knitting so much recently is a feeling of inability. I keep looking at all these wonderful books I have, finding great projects and going "Oh, but I can't afford that yarn." or "I haven't got those needles". I came away from the things that were supposed to inspire me feeling nervous and inadequate. Nothing was being knit because I didn't want to take the chance that I'd do it wrong.

I've learned in my life that I'm missing out on a lot of stuff because I'm afraid of it. I'm scared to start a new hobby or try a new food or even talk to someone because I didn't want to do it wrong. Because I know so many amazingly talented people, I've been scared to try new dance forms or even push my acting further, not wanting to be mocked. I really hate attempting my school work on my own, because I don't want to mess it up and not have a perfect grade, so I put it off until the last possible moment. Then I hurry it through and don't get as nice of a grade as I could have because I was so rushed.

This idea that it doesn't matter, that anything I choose to make will not only be fine but will actually be treasured and wanted even without perfection, is very freeing for me. Here is pleasure simply in what I can do now, instead of what I will be able to do or should have already done. This is the simple present tense and I am discovering that this is exactly the right place for me to live.

Send help, there are knit things all over the desk and they appear to be getting bigger!

Thursday, February 17, 2011

Do Homeless Women Still Like Pink?

I've gone and picked up another hobby. More specifically, I've picked up an outlet for a hobby I already have, no new tools or spaces required.

The other night I was taking the kid and a friend out to Schlotzky's for dinner and I walked into the middle of a fiberfest. There, amid the sandwiches and pizzas, an intrepid group of women had set up a spinning wheel. They were knitting in the corners and crocheting in the aisles. The wheel was whorring along, turning purple fluff into a lovely fingering weight yarn. When I asked them why, they informed me that they were a group of local fiberfans who met there every Thursday and stayed quite late. They originally formed thanks to the Austin Scarf Project, a group who makes hats and scarves for the homeless.They take donations of yarn or pre-made scarves, but they really enjoy having people come out and just knit (or crochet) with them.

This idea really appealed to me on a number of levels. First of all, I tend to avoid doing a lot of social work because I always feel overwhelmed. While I don't mind helping the Red Cross with a shelter, or mucking out a flooded house, I come away from the experience depressed because I can only do so much. The last flood I helped clean out put me in bed for a few days when my back went out at the end of work. But this is an immediate solution to a problem.If you're cold, you put on a hat.

Secondly, I really like to make scarves. They've become the knitting addiction of choice for me. I can cast on an easy one and blow through it in a few hours or pick a fancy lace or cable pattern and work on it for weeks. I can knit them on the bus or in line, at the theater, or in class, or in front of the TV. I have a box full of the things since almost everyone I know already has one. You've only got the one neck so how many scarves do you really need?

Thirdly, and most selfishly, I'm running out of room to buy yarn. I have a fairly impressive stash at this point and I'm under interdict to not buy anymore. When you find yourself sneaking more yarn into the house and hiding it in the liquor cabinet you know you have a small problem.I'm fairly sure I'm addicted.

One of the reasons I have so much yarn is that I inherited a large amount from my grandmother. While she was a busy and active woman, my grandmother didn't actually knit. She used the yarn to make canvas cross-stitch pictures. That means that all the yarn she bought was the cheapest acrylic possible. I haven't been knitting with it because the wools, cottons, and silks feel better on my hands. The acrylic isn't *nasty*, it's just not what I prefer to touch. Which is where the questions come in for me. If I knit a scarf from bubblegum pink and white acrylic, something I'd never ever wear unless I was desperate, is it appropriate to give it away? Just because I don't care for it, will someone else still love it? If you're freezing to death do you care if your scarf looks like someone skinned a Barbie?

I think the answer to these questions is "Start knitting!" and I'm doing my bit for now. Tonight, I'll go knit in a sandwich shop, tomorrow I'll knit on the bus. My motivation is clearly not without some self-interest, but I hope I can also do a little good along the way.

Sunday, February 13, 2011

Some Progress

I've made a little progress on the Killer Craft List (of DOOOOOM) and I thought I'd share what happened.

The kid got her Spanish Gown from the underthings out on time. It wasn't exactly what I wanted, but it worked out. I made a chemise with the giant hanging Spanish sleeves and a square neck. I learned the weight of the sleeves will pull that neck right off the shoulders no matter what and I'm going back to the portraits to see if there's something I can do to fix that.

The corset was a gift from a friend and I wound up buying a hoop skirt from a bridal store because I was out of time to mess with it. That changed the shape of the skirt in a way I hadn't wanted and pushed the time period from 1490's to 1560's. So instead of making the skirt and bodice all one and pretty unique, I just whipped up a regular separate Elizabethan over-skirt and turned an old dance vest into a square-necked bodice. The over-skirt had been most of a velvet Norman bliaunt that a friend had given me last year and the dance vest had been a gift from a few years back. I used leftover trim from another project for the neck and made the under-skirt out of some terrifying black stretch velvet that had been a gift also. The hat was one I had bought for myself years ago and never liked how it fit me. It fits the shape of her head much better. I'm rather proud of the fact that the only money I spent on this project was the hoops. Everything else came out of the stash and that makes the room just that much cleaner.

The kid and I have put in our money and gotten onto the list. We'll be going to Gulf Wars this year with one of my girlfriends from the acting troupe. Lots of estrogen on this excursion. We'll spend a week living in a tent together with no contact with the outside world. It's going to be very interesting, possibly in the Chinese sense of the word.

That being said, we don't have enough washable (and mud-able) period clothing to get us both through the week at the moment. I'm going to keep working away on the craft list and I'll probably see what of my old stuff I can make over for her as well. Emergency clothing always seems to come up when I least expect it.

If I can find a good looking photo of the new stuff I'll put it up here for you at some point. Right now I think the ones I have don't show the clothing well.

Sunday, February 6, 2011

Self: Absorbsion, Entitlement, Adoration...Annoyance

I'm going to indulge in a shameless fit of hypocrisy. I'm going to use this forum, which few if anyone besides myself are (is?) aware of, to complain about a person who is currently complaining about me. The reason I feel no shame about this is because the complainer is my teen-aged daughter and I've been able to hear her complaints about me for well over an hour now. I'm sure the neighbors have heard it all as well.It's sheer hypocrisy of course because there's no way a person who can't hear the charges can defend themselves. Of course, she can't hear them when I'm telling them to her face.

Obviously, every parent of every teenager ever born has to deal with "You never let me do anything!!!" along with the associated slamming of doors and heavy sulks. Until I had a teen I didn't know that 'heavy sulks' could actually be felt. I've walked into them in my own home now and been convinced they're a form of emotional spider web. She manages to give a depth and breadth to sullen I haven't personally felt since my younger sister moved out. The few times I've slipped and called her by her aunt's name haven't helped I'm sure.

The door slamming itself might not be so bad, if she'd keep her fit inside the room. Instead, she gets on the phone with whichever one of her cronies she's not currently fighting with (aka her BFF!) and maligns me as loudly as possible for as long as her voice or her listeners' ear holds out. So far the max has been 3 hours, but I think she only gave up then when her phone ran out of battery. Sadly for me, since she has constant fights with all her friends, she gets to recount her story multiple times in one week. By the end of the list I'm 70ft tall with fangs, and I've never let her out in the sun since the day she was born, and I eat babies.

Sometimes, in a fit of outrage, she'll send really nasty texts to everyone on her contacts list informing them that she's had it with living here, she just can't handle it, etc. This produces instant results with worried parents calling me having found these things on their kids' phones or my own parents racing over to the house. What normally happens then is yet another visit from CPS or the school counselor, yet another round of "so where is she going to therapy?" questions, and in the end everyone except the teen figuring out that this is yet another time she's cried "wolf!" None of this registers as excessive to her of course. No matter how much help she's been given it's never enough and there's just never quite enough attention to satisfy her. The difference between good and bad attention never enters into it.

I love my daughter and I have every hope that she'll grow up to an intelligent, useful, generous member of society. Some days I have to sit on the floor in my closet telling myself that over and over, but I truly believe it. One day, when she is a mother of a teen, I will do what my mother is doing now. I'll come over when they need me, I'll always try to have an encouraging or distracting thing to say and I'll call once a week to make sure everyone is still alive.

I can't wait.

Tuesday, January 11, 2011

Some Progress


So, a report on the Craft List o'Doom!

First up: A Black and Blue (and Grey) Jayne hat!
While said critter may look complete, I'm still unsure about the trustworthiness of that pom-pom. I think I may just sew the thing down before I release it into the wild.

Next: Kaitlyn's Candlemas Outfit!
I've got the chemise finished except for the hemming and the fancy work on the collar. The bodice is ready for eyelets and trim and the skirts, both hoop and outer, have yet to be cut out. I still need to go buy boning for the hoops anyway and I'm very temped to just go to a wedding supply place and purchase one due to the tight schedule.

Last but not least: The Gold Elizabethan hat!
It still needs bling, but since the last time you saw it was as a pile of parts I thought you might like to see how far it's come.